Remote Connect Raspberry Pi Behind Firewall: Free Mac Download Guide
Ever wondered how to connect to your Raspberry Pi from anywhere without breaking the bank? Well, buckle up, because we’re diving deep into the world of remote connections. Whether you're a tech enthusiast or just someone looking to expand their home automation skills, this guide is for you. We’ll cover everything you need to know about setting up a secure and free remote connection to your Raspberry Pi behind a firewall using your Mac.
Imagine being able to control your smart home devices, access files, or run scripts on your Raspberry Pi from miles away—all without paying a dime. Sounds too good to be true? Not anymore. With the right tools and a bit of know-how, you can achieve this effortlessly. Let’s get started by understanding why remote access is crucial in today’s digital age.
This guide isn’t just another tech article; it’s your ultimate companion for mastering remote connectivity. From setting up SSH tunnels to exploring free software options, we’ll walk you through every step of the process. So, whether you’re a beginner or an advanced user, there’s something here for everyone.
Read also:Tgtx Stocktwits The Ultimate Guide To Tapping Into The Trading Community
Why Remote Access to Raspberry Pi Matters
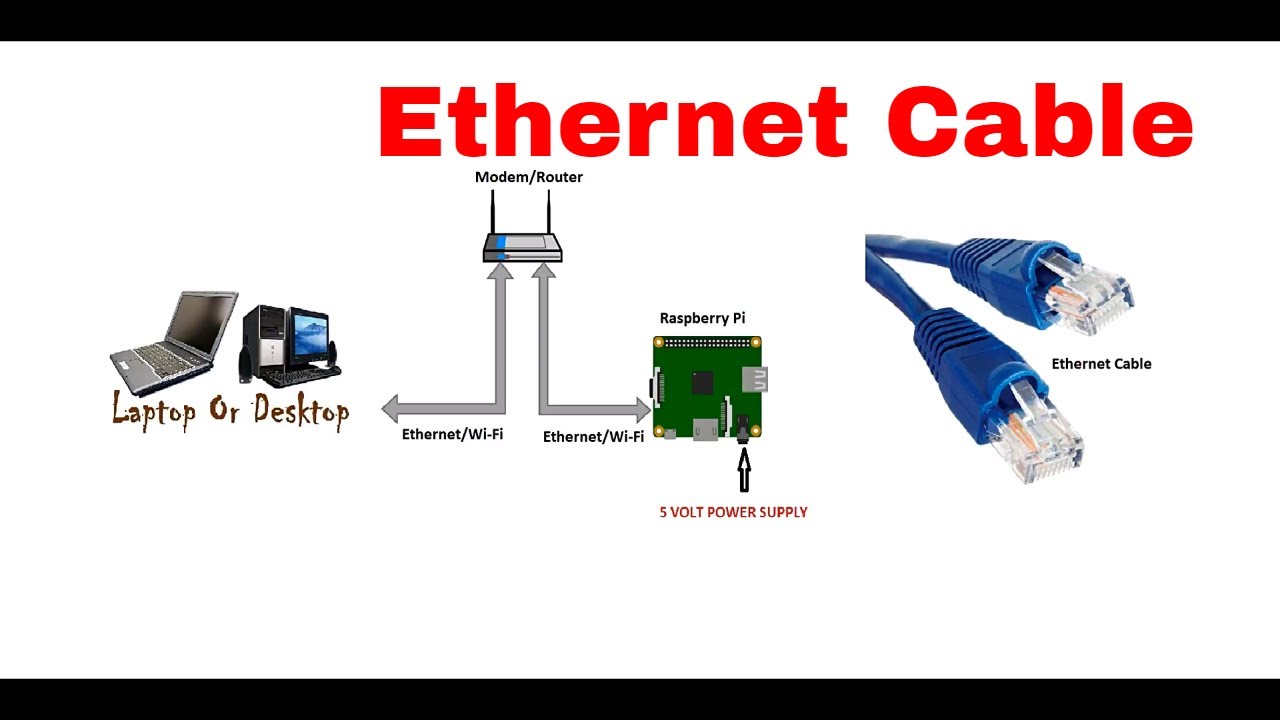
In today’s interconnected world, having remote access to your devices is more important than ever. Whether you’re managing servers, automating tasks, or simply accessing files, the ability to connect remotely opens up endless possibilities. For Raspberry Pi users, this means you can control your device from anywhere in the world, making it perfect for home automation, IoT projects, and more.
But here’s the catch: many people assume that setting up remote access requires expensive software or complex configurations. The truth is, with the right approach, you can achieve this for free—and we’re here to show you how. By connecting your Raspberry Pi behind a firewall, you ensure both security and convenience.
What You Need to Get Started
Before we dive into the nitty-gritty, let’s talk about what you’ll need to make this work. Don’t worry; it’s not as complicated as it sounds. Here’s a quick rundown:
- A Raspberry Pi (any model will do)
- A stable internet connection
- A Mac computer with SSH capabilities
- A free SSH client like PuTTY (for Windows users) or Terminal (for Mac users)
- A basic understanding of networking concepts
Once you have these essentials in place, you’re good to go. Let’s move on to the next step: setting up your Raspberry Pi for remote access.
Setting Up SSH on Your Raspberry Pi
SSH, or Secure Shell, is the backbone of remote connectivity. It allows you to securely connect to your Raspberry Pi from another device. Here’s how you can enable SSH on your Pi:
- Power on your Raspberry Pi and log in.
- Open the terminal and type
sudo raspi-config. - Select “Interfacing Options” and navigate to “SSH.”
- Choose “Enable” and reboot your Pi.
That’s it! Your Raspberry Pi is now ready to accept SSH connections. But what if your Pi is behind a firewall? Don’t worry; we’ve got you covered.
Read also:Who Is Monica Lewinskys Partner A Deep Dive Into Her Life Love And Journey
Troubleshooting SSH Connection Issues
Sometimes, even after enabling SSH, you might encounter connection issues. Here are a few common problems and their solutions:
- Firewall Blocking: Check your router settings to ensure that the necessary ports are open.
- Incorrect IP Address: Double-check your Pi’s IP address to ensure you’re connecting to the right device.
- Network Configuration: Ensure that your Pi is connected to the same network as your Mac.
With these tips, you’ll be able to troubleshoot any issues that arise during the setup process.
Connecting to Raspberry Pi Behind a Firewall
Firewalls are designed to protect your network from unauthorized access, but they can sometimes make remote connections tricky. The good news is, you can still connect to your Raspberry Pi behind a firewall using a technique called port forwarding.
What is Port Forwarding? Simply put, it’s the process of redirecting incoming network traffic from one port to another. This allows you to access your Raspberry Pi from outside your local network. Here’s how you can set it up:
- Log in to your router’s admin panel.
- Find the “Port Forwarding” section and create a new rule.
- Set the external port to 22 (default SSH port) and the internal IP address to your Raspberry Pi’s IP.
- Save the changes and test the connection.
By following these steps, you’ll be able to bypass the firewall and establish a secure connection to your Pi.
Alternative Methods for Remote Access
While port forwarding is a reliable method, it’s not the only option. Here are a few alternative methods you can try:
- Dynamic DNS: Use a service like No-IP to assign a domain name to your Raspberry Pi’s IP address.
- SSH Tunnels: Create a secure tunnel between your Mac and Raspberry Pi using SSH.
- Third-Party Apps: Explore apps like ngrok or PageKite for simplified remote access.
Each method has its own advantages, so choose the one that best suits your needs.
Free Mac Download Options for Remote Access
Now that your Raspberry Pi is set up for remote access, let’s talk about the tools you’ll need on your Mac. Fortunately, there are plenty of free options available:
- Terminal: A built-in SSH client that comes with macOS. Simply open Terminal and type
ssh username@pi_ip_address. - SecureCRT: A powerful SSH client with advanced features (free trial available).
- MobaXterm: A versatile tool that supports SSH, FTP, and more.
These tools make it easy to connect to your Raspberry Pi from your Mac without spending a dime.
Step-by-Step Guide to Using Terminal
Using Terminal is as simple as pie. Here’s a quick guide:
- Open Terminal on your Mac.
- Type
ssh pi@your_pi_ip_address. - Enter your Raspberry Pi’s password when prompted.
- You’re now connected!
That’s all there is to it. Terminal is a powerful tool that every Raspberry Pi user should know how to use.
Security Best Practices for Remote Connections
While remote access is convenient, it’s important to prioritize security. Here are a few best practices to keep your Raspberry Pi safe:
- Change Default Passwords: Never use the default “raspberry” password. Create a strong, unique password for your Pi.
- Enable Two-Factor Authentication: Use tools like Google Authenticator to add an extra layer of security.
- Keep Software Updated: Regularly update your Pi’s operating system and installed software to patch vulnerabilities.
By following these practices, you’ll ensure that your Raspberry Pi remains secure and protected from potential threats.
Common Security Risks and How to Avoid Them
Here are a few common security risks to watch out for:
- Brute Force Attacks: Limit login attempts and use fail2ban to block malicious IPs.
- Unsecured Connections: Always use SSH instead of plain text protocols like Telnet.
- Outdated Software: Keep your Pi’s software up to date to prevent exploitation of known vulnerabilities.
Staying informed and proactive is the key to maintaining a secure remote connection.
Troubleshooting Tips for Remote Connections
Even with the best setup, issues can arise. Here are a few troubleshooting tips to help you resolve common problems:
- Connection Timeout: Check your Pi’s IP address and ensure that the necessary ports are open.
- Authentication Failure: Double-check your username and password to ensure they’re correct.
- Network Issues: Restart your router and ensure that both devices are connected to the same network.
With these tips, you’ll be able to quickly identify and resolve any issues that arise during your remote connection.
When to Seek Professional Help
If you’ve tried everything and still can’t establish a connection, it might be time to seek professional help. Consider reaching out to a network administrator or tech support specialist for assistance. Remember, it’s always better to ask for help than to compromise your security.
Conclusion: Take Control of Your Raspberry Pi Anywhere
Remote access to your Raspberry Pi behind a firewall is easier than you might think. With the right tools and a bit of knowledge, you can connect to your Pi from anywhere in the world—all for free. Whether you’re managing a smart home or running complex scripts, this guide has everything you need to get started.
So, what are you waiting for? Dive in and start exploring the endless possibilities of remote connectivity. And don’t forget to share this article with your fellow tech enthusiasts. Together, we can make the world of IoT a little brighter—one Raspberry Pi at a time.
Table of Contents
- Why Remote Access to Raspberry Pi Matters
- What You Need to Get Started
- Setting Up SSH on Your Raspberry Pi
- Connecting to Raspberry Pi Behind a Firewall
- Free Mac Download Options for Remote Access
- Security Best Practices for Remote Connections
- Troubleshooting Tips for Remote Connections
Thanks for reading, and happy tinkering!


