RemoteIoT Web SSH Tutorial: Your Ultimate Guide To Securely Accessing IoT Devices
Let’s face it, in this digital age, the Internet of Things (IoT) is no longer just a buzzword—it’s a necessity. If you’re diving into the world of IoT, you’ll eventually need to learn how to remotely manage and secure your devices. That’s where RemoteIoT web SSH tutorial comes into play. Whether you’re a beginner or an experienced tech enthusiast, mastering web SSH for IoT devices can make your life a whole lot easier. So, buckle up because we’re about to take you on a ride through the world of remote access and security.
Imagine this: you’re at work, but your IoT device back at home needs a quick update. Without web SSH, you’d either have to physically go back home or rely on outdated methods that are frankly not secure enough. With RemoteIoT web SSH, you can access your devices from anywhere in the world as long as you have an internet connection. Sounds pretty cool, right?
This tutorial isn’t just about teaching you how to set up web SSH for IoT devices. It’s about empowering you to take control of your tech, ensuring your data remains safe, and giving you the tools to troubleshoot like a pro. So, let’s get started and turn you into a remote IoT guru!
Read also:Remote Connect Raspberry Pi Behind Firewall Not Working Mac Download The Ultimate Guide
Table of Contents
- What is Web SSH?
- Why Use Web SSH for IoT?
- RemoteIoT Basics
- Setting Up Web SSH
- Securing Your Connection
- Troubleshooting Tips
- Common Mistakes to Avoid
- Advanced Techniques
- Tools You Need
- Final Thoughts
What is Web SSH?
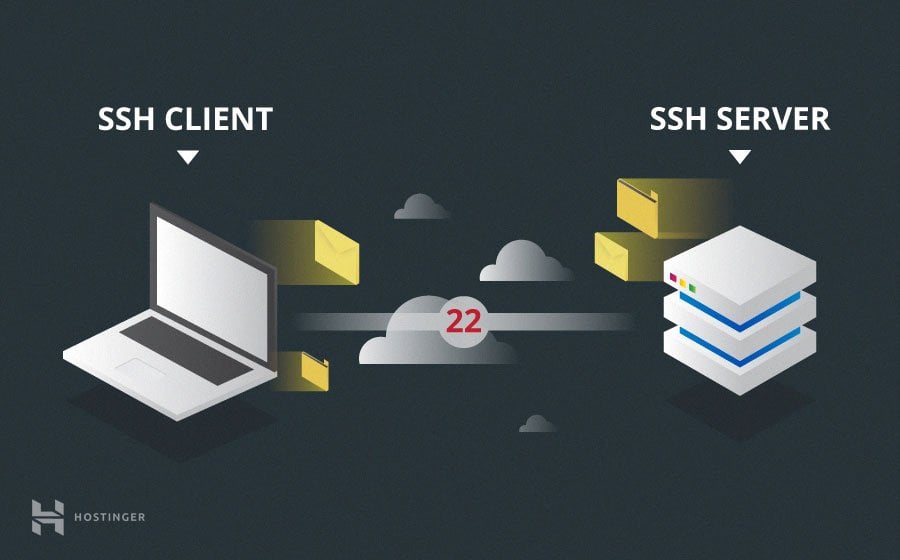
Alright, let’s break it down. SSH stands for Secure Shell, and it’s basically a protocol that allows you to remotely access and control devices securely. Think of it as a super-secure way to connect to your IoT devices over the internet. Now, web SSH takes this a step further by letting you access your devices through a web browser instead of using a dedicated SSH client. This makes it super convenient, especially if you’re on the go.
How Does Web SSH Work?
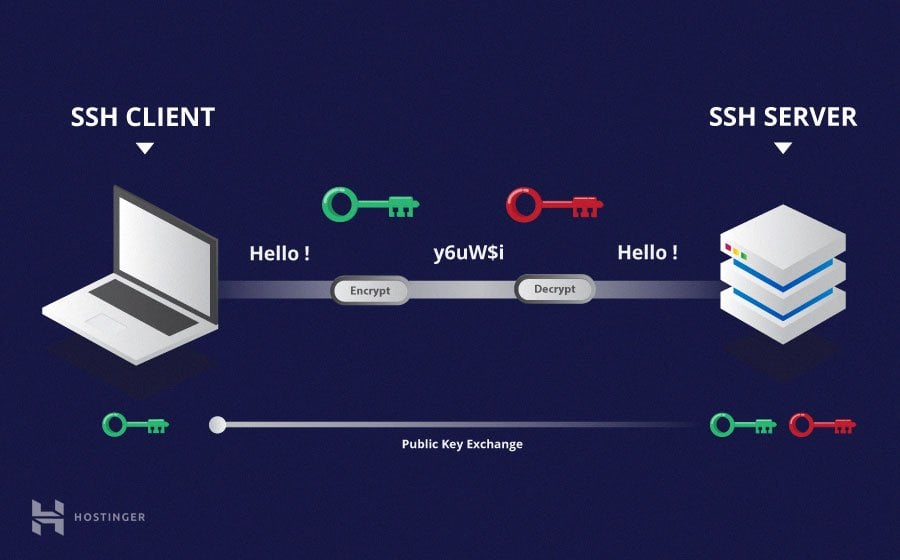
Here’s the deal: when you use web SSH, your browser acts as the client, and it communicates with your IoT device through an encrypted connection. This means that even if someone tries to snoop on your data, they won’t be able to make sense of it. It’s like speaking in a secret code that only you and your device understand.
Why Use Web SSH for IoT?
There are plenty of reasons why web SSH is a game-changer for IoT enthusiasts. First and foremost, it’s secure. Unlike other methods that might leave your devices vulnerable, web SSH uses encryption to protect your data. Plus, it’s super easy to use once you get the hang of it. You don’t need to install any extra software—just fire up your browser and you’re good to go.
Benefits of Using Web SSH for IoT
- Security: Encrypts all communication between you and your device.
- Convenience: Access your devices from anywhere using just a browser.
- Efficiency: Streamlines remote management and troubleshooting.
- Cost-Effective: No need for additional hardware or software.
RemoteIoT Basics
Before we dive deeper, let’s talk about RemoteIoT itself. RemoteIoT is a framework designed specifically for managing IoT devices remotely. It integrates seamlessly with web SSH, making it one of the best options for anyone looking to take their IoT game to the next level. Whether you’re managing smart home devices, industrial sensors, or anything in between, RemoteIoT has got you covered.
Key Features of RemoteIoT
- Supports multiple protocols, including web SSH.
- Easy-to-use interface for beginners and pros alike.
- Highly customizable to fit your specific needs.
- Regular updates to ensure top-notch security.
Setting Up Web SSH
Now, let’s get our hands dirty and set up web SSH for your IoT devices. Don’t worry—it’s not as complicated as it sounds. Follow these simple steps, and you’ll be up and running in no time.
Step 1: Install Necessary Software
First things first, you’ll need to install the software that enables web SSH on your IoT device. Most modern IoT devices come with this pre-installed, but if yours doesn’t, you can easily add it using package managers like apt or yum. Just make sure you’re downloading from trusted sources to avoid any security risks.
Read also:Rutshelle Guillaume Net Worth The Rising Stars Journey To Stardom
Step 2: Configure Your Device
Once the software is installed, it’s time to configure your device. This usually involves setting up usernames, passwords, and other security settings. It’s super important to use strong, unique passwords to keep your device safe from unauthorized access.
Step 3: Test Your Connection
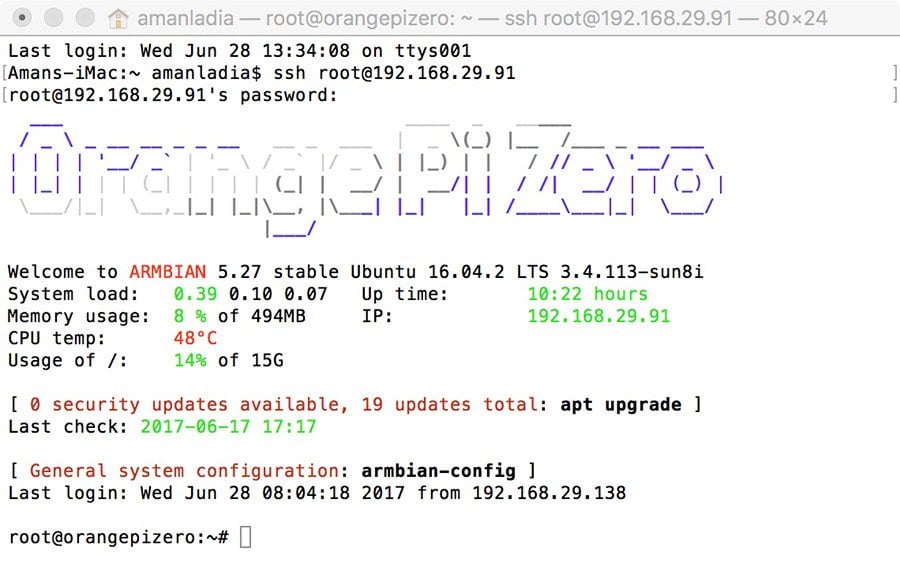
After everything is set up, it’s a good idea to test your connection. Open up your browser, enter the IP address of your device, and see if you can log in successfully. If everything goes smoothly, congratulations—you’re ready to start managing your IoT devices remotely!
Securing Your Connection
Security should always be at the top of your priority list when dealing with IoT devices. Here are a few tips to help you secure your web SSH connection:
Use Strong Authentication Methods
Instead of relying solely on passwords, consider using public key authentication. This method uses cryptographic keys to verify your identity, making it much harder for hackers to break in.
Regularly Update Your Software
Software updates often include important security patches that protect your device from vulnerabilities. Make it a habit to check for updates regularly and install them as soon as they’re available.
Monitor Your Connections
Keep an eye on who’s accessing your devices. Most web SSH clients have logging capabilities that allow you to track login attempts and other activities. If you notice anything suspicious, take action immediately to protect your data.
Troubleshooting Tips
Even the best-laid plans can sometimes go awry. If you run into issues while setting up or using web SSH, here are a few troubleshooting tips to help you out:
- Double-check your IP address and port settings.
- Ensure your device is connected to the internet.
- Try restarting your device and browser.
- Consult the documentation for your specific device or software.
Common Mistakes to Avoid
Here are some common mistakes people make when using web SSH for IoT devices:
Using Weak Passwords
Let’s be real—using "password123" might be easy to remember, but it’s also super easy for hackers to guess. Always use strong, complex passwords that include a mix of letters, numbers, and symbols.
Ignoring Software Updates
Skipping updates might save you a few minutes in the short term, but it could cost you big time in the long run. Stay on top of updates to keep your devices secure.
Advanced Techniques
If you’re ready to take your web SSH skills to the next level, here are a few advanced techniques to explore:
Set Up a Reverse SSH Tunnel
A reverse SSH tunnel allows you to connect to your device even if it’s behind a firewall or NAT. This can be super useful if you’re dealing with more complex network setups.
Automate Routine Tasks
Use scripts to automate repetitive tasks like backups or updates. This not only saves you time but also reduces the risk of human error.
Tools You Need
Here’s a list of tools that can help you get the most out of your web SSH experience:
- Putty: A popular SSH client for Windows users.
- Termius: A cross-platform SSH client with a sleek interface.
- SecureCRT: A powerful SSH client with advanced features.
Final Thoughts
There you have it—your ultimate guide to RemoteIoT web SSH tutorial. Whether you’re just starting out or looking to enhance your existing setup, the tips and techniques in this article should help you get the most out of your IoT devices. Remember, security is key, so always stay vigilant and keep your systems up to date.
So, what are you waiting for? Dive in, experiment, and let us know how it goes. Feel free to leave a comment below or share this article with your fellow tech enthusiasts. And hey, if you’re craving more IoT goodness, check out our other articles for even more tips and tricks!

 is no longer just a buzzword—it’s a necessity. If you’re diving into th)