How To Use SSH RemoteIoT: A Beginner’s Guide To Secure Remote Access
So, you're diving into the world of SSH and remote IoT management, huh? That's awesome because this is one of the most powerful tools for anyone working with connected devices. Whether you're a hobbyist tinkering with Raspberry Pi or a professional managing an entire network of IoT devices, understanding how to use SSH RemoteIoT can seriously level up your game. Let’s break it down step by step so you can get started right away.
SSH (Secure Shell) is more than just a fancy acronym—it’s your key to securely accessing remote systems over unsecured networks. It’s like having a secret handshake with your devices, ensuring that no one else can eavesdrop on what you're doing. And when it comes to IoT, where security is a top priority, SSH is your best friend.
Now, if you’re thinking, “Wait, what exactly does SSH RemoteIoT mean?” don’t worry. We’ll cover everything from the basics to the more advanced stuff. By the end of this guide, you’ll be confidently setting up SSH connections and managing your IoT devices like a pro. So buckle up, grab a coffee, and let’s dive in!
Read also:Lester Holt Health A Comprehensive Dive Into The Wellness Of A Broadcast Icon
Table of Contents:
- What is SSH RemoteIoT?
- Why Use SSH for IoT Devices?
- Getting Started with SSH
- Setting Up SSH on Your IoT Device
- Connecting to Your IoT Device via SSH
- Tips for Securing Your SSH Connection
- Common Issues and Troubleshooting
- Advanced Features of SSH RemoteIoT
- Best Practices for Using SSH with IoT
- Conclusion and Next Steps
What is SSH RemoteIoT?
Alright, let’s start with the basics. SSH RemoteIoT refers to using SSH (Secure Shell) to remotely access and manage IoT (Internet of Things) devices. Think of it as a secure bridge between your computer and your IoT gadget, allowing you to send commands, transfer files, and monitor performance—all from the comfort of your desk.
SSH isn’t just about typing commands; it’s about creating a secure channel that encrypts all data exchanged between your local machine and the remote IoT device. This makes it perfect for managing sensitive devices like smart home systems, industrial sensors, or even weather stations.
And here’s the kicker: SSH isn’t limited to Linux-based systems. You can use it on Windows, macOS, and even mobile platforms. So no matter what device you’re working with, SSH has got your back.
Why SSH is Important for IoT
IoT devices are everywhere these days, from smart fridges to autonomous drones. But with great power comes great responsibility—and that responsibility is security. Unlike traditional computers, many IoT devices lack robust built-in security measures. That’s where SSH comes in.
By using SSH RemoteIoT, you ensure that your communication with the device is encrypted, reducing the risk of unauthorized access or data breaches. Plus, it gives you full control over the device, allowing you to troubleshoot issues, update firmware, and configure settings without being physically present.
Read also:Who Is Monica Lewinskys Partner A Deep Dive Into Her Life Love And Journey
Why Use SSH for IoT Devices?
Let’s face it: IoT devices aren’t exactly known for their security features. Many of them come with default passwords, outdated firmware, and minimal encryption. This makes them prime targets for hackers. But by using SSH, you can add a layer of protection that keeps your devices safe.
Here are some reasons why SSH is a game-changer for IoT:
- Encryption: All data transmitted between your computer and the IoT device is encrypted, making it nearly impossible for attackers to intercept.
- Authentication: SSH uses public-key cryptography to verify the identity of both the client and the server, ensuring that only authorized users can access the device.
- Remote Management: You can manage your IoT devices from anywhere in the world, as long as you have an internet connection.
- Flexibility: SSH works across different operating systems and platforms, making it a versatile tool for any IoT project.
Getting Started with SSH
Ready to dive in? Great! Before we get into the nitty-gritty, let’s cover the basics of setting up SSH. You’ll need a few things to get started:
- An IoT Device: This could be anything from a Raspberry Pi to an ESP32.
- An SSH Client: Most modern operating systems come with built-in SSH clients. On Windows, you can use PuTTY or the Windows Subsystem for Linux (WSL).
- Internet Connection: Both your computer and the IoT device need to be connected to the same network (or accessible over the internet).
Once you have everything ready, it’s time to configure SSH on your IoT device. Don’t worry—we’ll walk you through it step by step.
Setting Up SSH on Your IoT Device
Setting up SSH on an IoT device is surprisingly simple. Here’s how you can do it:
Step 1: Enable SSH on Your Device
Most IoT devices come with SSH disabled by default for security reasons. To enable it, you’ll need to access the device’s configuration settings. For example, on a Raspberry Pi, you can enable SSH by running the following command:
sudo raspi-config
From there, navigate to “Interfacing Options” > “SSH” and select “Enable.” Easy peasy!
Step 2: Generate SSH Keys
SSH keys are like digital IDs that allow you to authenticate without entering a password every time. To generate SSH keys, use the following command:
ssh-keygen -t rsa -b 4096
This will create a public and private key pair. Make sure to save the keys in a secure location.
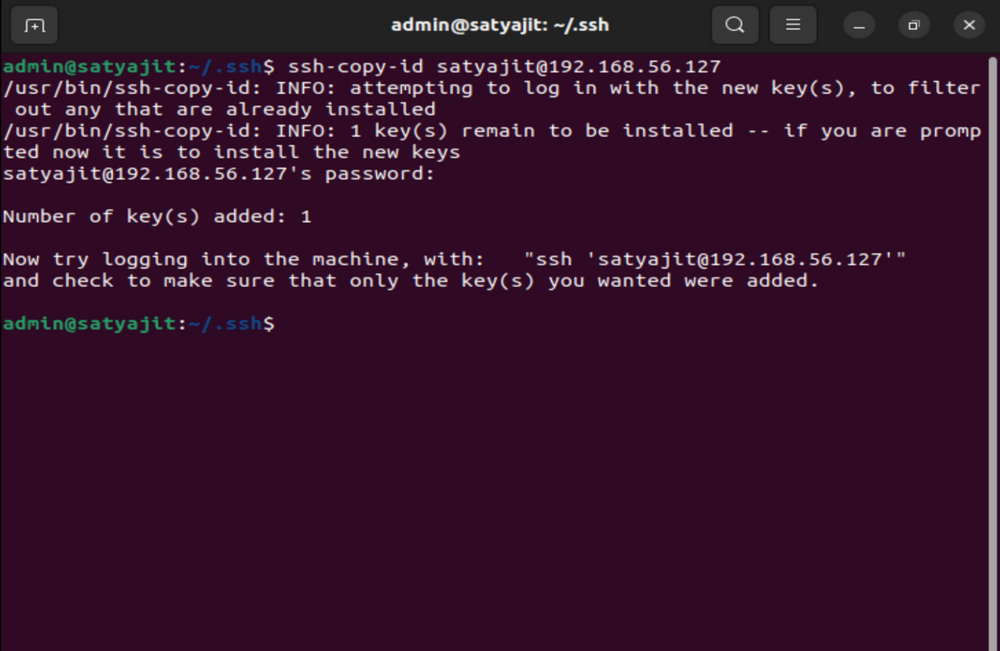
Step 3: Copy the Public Key to Your IoT Device
Now that you have your SSH keys, it’s time to copy the public key to your IoT device. Use the following command:
ssh-copy-id user@iot-device-ip
Replace “user” with the username for your IoT device and “iot-device-ip” with the device’s IP address. This will allow you to log in without a password.
Connecting to Your IoT Device via SSH
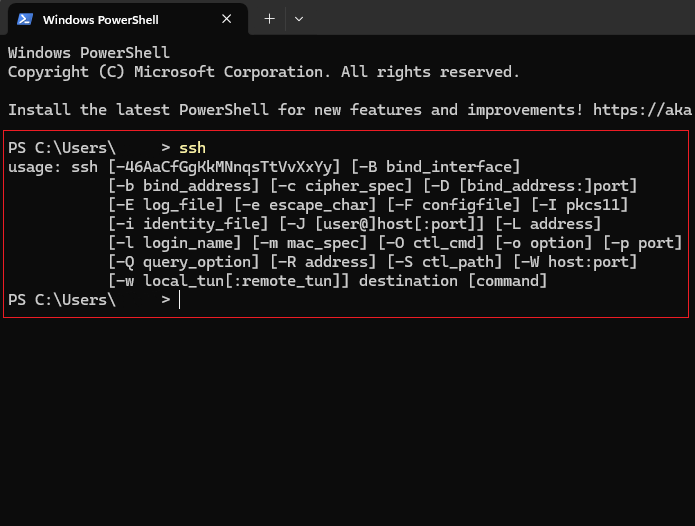
With everything set up, it’s time to connect to your IoT device. Open your SSH client and enter the following command:
ssh user@iot-device-ip
If everything is configured correctly, you should now have a secure connection to your IoT device. From here, you can start issuing commands, transferring files, and managing your device remotely.
Tips for Efficient SSH Usage
Here are a few tips to make your SSH experience smoother:
- Use Aliases: Create aliases for frequently used commands to save time.
- Enable Compression: If you’re transferring large files, enable compression to speed up the process.
- Monitor Logs: Keep an eye on your SSH logs to detect any suspicious activity.
Tips for Securing Your SSH Connection
Security is key when it comes to SSH RemoteIoT. Here are some best practices to keep your connections safe:
- Disable Password Authentication: Use SSH keys instead of passwords to prevent brute-force attacks.
- Change the Default Port: Move SSH from its default port (22) to a non-standard port to reduce automated attacks.
- Limit Access: Restrict SSH access to specific IP addresses or networks.
- Update Regularly: Keep your SSH software and firmware up to date to patch any vulnerabilities.
Common Issues and Troubleshooting
Even the best-laid plans can go awry. Here are some common issues you might encounter when using SSH RemoteIoT and how to fix them:
Issue 1: Connection Refused
If you’re getting a “Connection Refused” error, it could mean that SSH isn’t running on the device. Check the device’s configuration and ensure that SSH is enabled.
Issue 2: Permission Denied
This usually happens when your SSH keys aren’t configured correctly. Double-check that your public key is copied to the device and that file permissions are set properly.
Issue 3: Slow Connection
If your connection is sluggish, try enabling compression or optimizing your network settings.
Advanced Features of SSH RemoteIoT
Once you’ve mastered the basics, it’s time to explore some advanced features of SSH:
Tunneling
SSH tunneling allows you to securely access services running on your IoT device, such as web servers or databases. This is particularly useful if you want to expose a service to the internet without compromising security.
Port Forwarding
With SSH port forwarding, you can redirect traffic from one port to another. This is great for accessing services behind firewalls or NAT routers.
SSHFS
SSHFS lets you mount remote file systems over SSH, giving you easy access to files on your IoT device as if they were local.
Best Practices for Using SSH with IoT
To get the most out of SSH RemoteIoT, follow these best practices:
- Document Everything: Keep detailed notes of your configurations and setups for future reference.
- Automate Where Possible: Use scripts to automate repetitive tasks, saving you time and effort.
- Monitor Regularly: Set up monitoring tools to keep an eye on your IoT devices and detect any issues early.
Conclusion and Next Steps
And there you have it—a comprehensive guide to using SSH RemoteIoT. Whether you’re a beginner or an experienced pro, SSH is an invaluable tool for managing IoT devices securely and efficiently. By following the steps outlined in this article, you’ll be well on your way to mastering SSH and taking your IoT projects to the next level.
So what are you waiting for? Fire up your SSH client, connect to your IoT device, and start exploring. And don’t forget to share your experiences in the comments below. Who knows—you might just inspire someone else to take the plunge into the world of SSH RemoteIoT!

