How To Install Sconces: A Step-by-Step Guide For Every Home Enthusiast
So here we are, diving into the world of sconces. You’ve probably seen these wall-mounted fixtures in fancy hotels, cozy cafes, or even your neighbor’s living room. But have you ever wondered how to install sconces yourself? Let me tell you, it’s not rocket science. With the right tools, a bit of patience, and this guide, you’ll be lighting up your walls like a pro in no time.
Installing sconces is more than just a DIY project; it’s about adding personality and functionality to your space. Whether you’re looking to brighten up a dull corner or create a dramatic ambiance in your bedroom, sconces are the answer. And hey, who wouldn’t want to save a few bucks by skipping the pricey electrician?
But before we get into the nitty-gritty, let’s talk about why sconces are so darn popular. They’re versatile, stylish, and can transform any room with minimal effort. Plus, they’re super easy to install if you follow the right steps. So buckle up, because we’re about to dive deep into how to install sconces like a boss.
Read also:Mastering Remote Ssh Raspberry Pi A Comprehensive Guide For Tech Enthusiasts
What Are Sconces, Anyway?
Before we jump into the installation process, let’s break down what sconces actually are. Simply put, sconces are wall-mounted lighting fixtures that come in all shapes and sizes. They can be purely decorative, functional, or both. Some sconces use candles (old-school vibes), while others are powered by electricity and designed for modern homes.
Why should you care about sconces? Well, they’re not just lighting fixtures—they’re statement pieces. They can highlight artwork, create cozy nooks, or serve as practical task lighting. And the best part? They don’t take up floor space like floor lamps or clutter your desk like table lamps. Talk about a win-win.
Why Install Sconces?
Here’s the deal: sconces aren’t just for aesthetics. They’re practical, too. Need proof? Here are a few reasons why installing sconces is a smart move:
- Enhance Your Space: Sconces add layers of light, making your room feel cozier and more inviting.
- Save Space: Unlike floor or table lamps, sconces mount directly on the wall, freeing up valuable real estate.
- Boost Energy Efficiency: With LED options, sconces can save you money on electricity bills.
- Create Ambiance: Whether you’re hosting a dinner party or just relaxing with a book, sconces set the mood.
Tools and Materials You’ll Need
Alright, let’s talk about the essentials. Before you start installing sconces, make sure you have everything you need. Trust me, running back and forth to the hardware store mid-project is no fun. Here’s what you’ll need:
- Sconces (duh)
- Drill
- Screwdriver
- Wire strippers
- Wire nuts
- Voltage tester
- Ladder or step stool
- Measuring tape
- Pencil
And if you’re working with drywall, you might want to grab some wall anchors to ensure your sconces stay securely in place. Safety first, folks!
Choosing the Right Sconces
Not all sconces are created equal. When shopping for your fixtures, consider the following:
Read also:Emerson Peraza The Rising Star In The Entertainment World
- Style: Do you want modern, rustic, industrial, or something else entirely? The options are endless.
- Size: Measure your wall space to ensure the sconces won’t look too big or too small.
- Bulb Type: LED, incandescent, or halogen? Each has its pros and cons.
- Finish: Match the finish of your sconces with other metal accents in the room for a cohesive look.
How to Install Sconces: The Step-by-Step Process
Now that you’ve got your tools and sconces ready, it’s time to roll up your sleeves and get to work. Follow these steps carefully, and you’ll have your sconces up and shining in no time.
Step 1: Turn Off the Power
Safety first, folks. Before you start tinkering with electrical wiring, head to your circuit breaker and turn off the power to the room where you’ll be working. Use a voltage tester to double-check that there’s no current running to the outlet or switch you’ll be using.
Step 2: Choose the Perfect Spot
Where you place your sconces matters. Consider the height, spacing, and overall layout of your room. A general rule of thumb is to mount sconces about 60-66 inches from the floor, but feel free to adjust based on your specific needs.
Step 3: Mark the Mounting Points
Use a pencil to mark the spots where you’ll be drilling. Make sure the sconces are level and evenly spaced. If you’re unsure, use a level tool to ensure everything lines up perfectly.
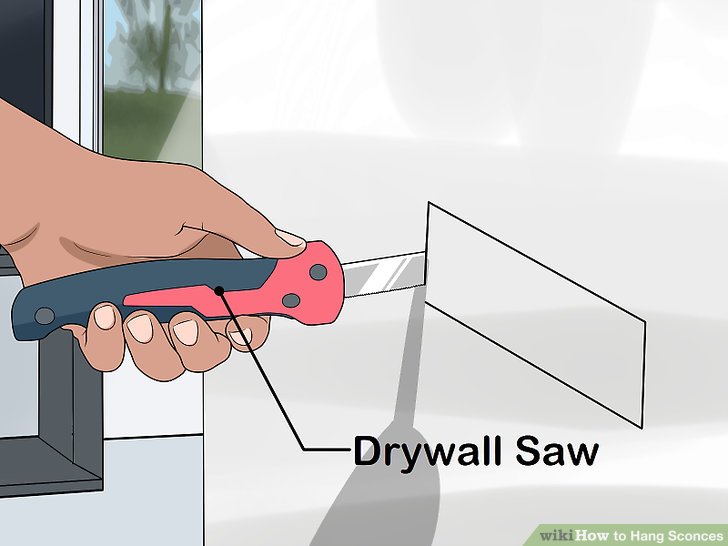
Step 4: Drill the Holes
Grab your drill and create pilot holes at the marked spots. If you’re working with drywall, insert wall anchors for added stability. Pro tip: go slow and steady to avoid damaging the wall.
Step 5: Mount the Sconces
Attach the mounting bracket to the wall using screws. Once it’s secure, carefully attach the sconce to the bracket. Make sure everything is snug and tight before moving on to the next step.
Step 6: Connect the Wiring
This is where things get a little technical. Connect the wires from the sconce to the wires in the wall. Typically, you’ll need to connect the black (hot) wire to black, white (neutral) to white, and green or bare (ground) to green or bare. Use wire nuts to secure the connections and tuck the wires neatly into the electrical box.
Step 7: Attach the Light Bulbs
Once the wiring is done, screw in the light bulbs according to the manufacturer’s specifications. Avoid using bulbs with a higher wattage than recommended to prevent overheating.
Step 8: Test the Sconces
Head back to the circuit breaker and turn the power back on. Flip the switch and voilà—your sconces should light up beautifully. If they don’t, double-check your wiring and connections.
Tips and Tricks for Sconce Installation
Here are a few extra tips to make your sconce installation a breeze:
- Plan Ahead: Sketch out your layout beforehand to avoid last-minute changes.
- Use a Helper: Two hands are better than one, especially when handling tools and sconces.
- Consider Dimmers: Add dimmer switches for adjustable lighting options.
- Be Mindful of Codes: Check local electrical codes to ensure your installation is up to par.
Common Mistakes to Avoid
Even the best of us make mistakes sometimes. Here are a few common pitfalls to watch out for:
- Skipping the Voltage Tester: Always double-check that the power is off before starting.
- Drilling Too Deep: Be careful not to damage pipes or other wiring behind the wall.
- Using the Wrong Bulbs: Stick to the recommended wattage to avoid safety hazards.
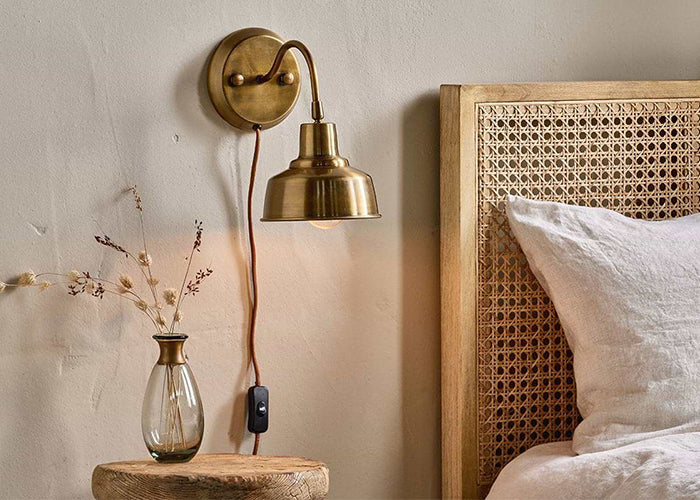
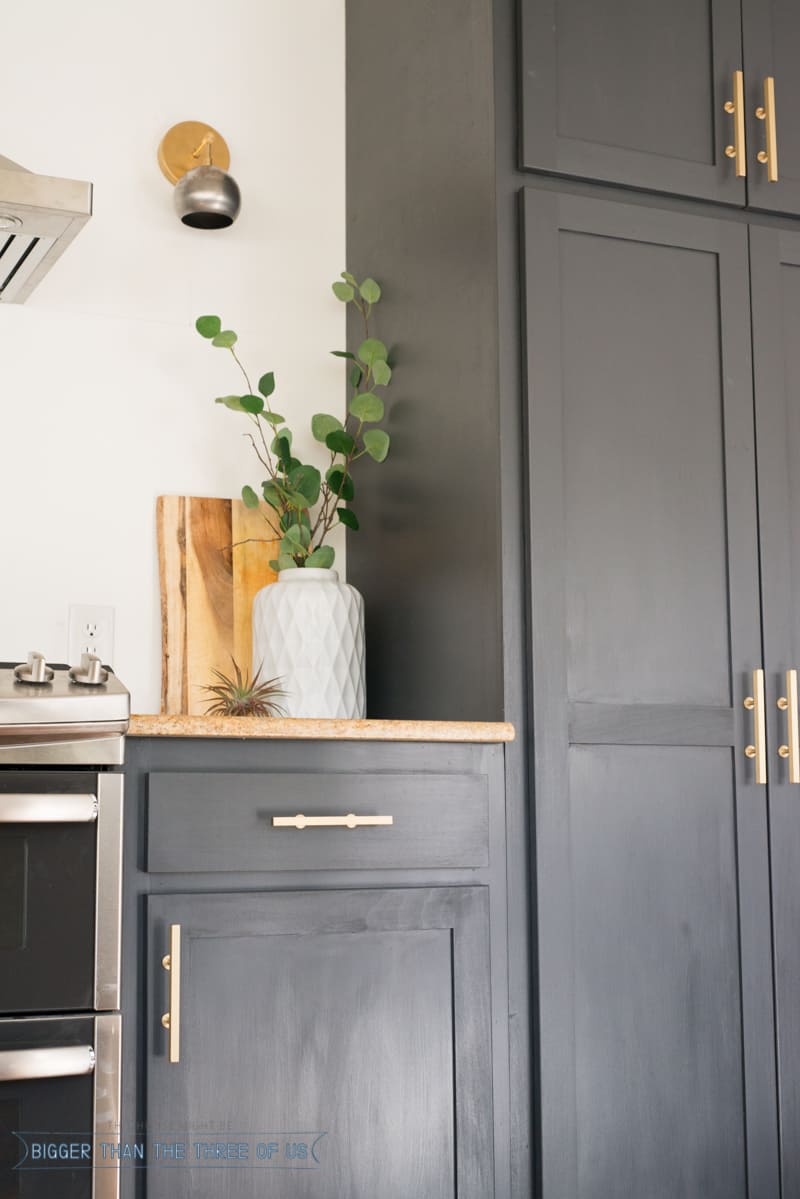
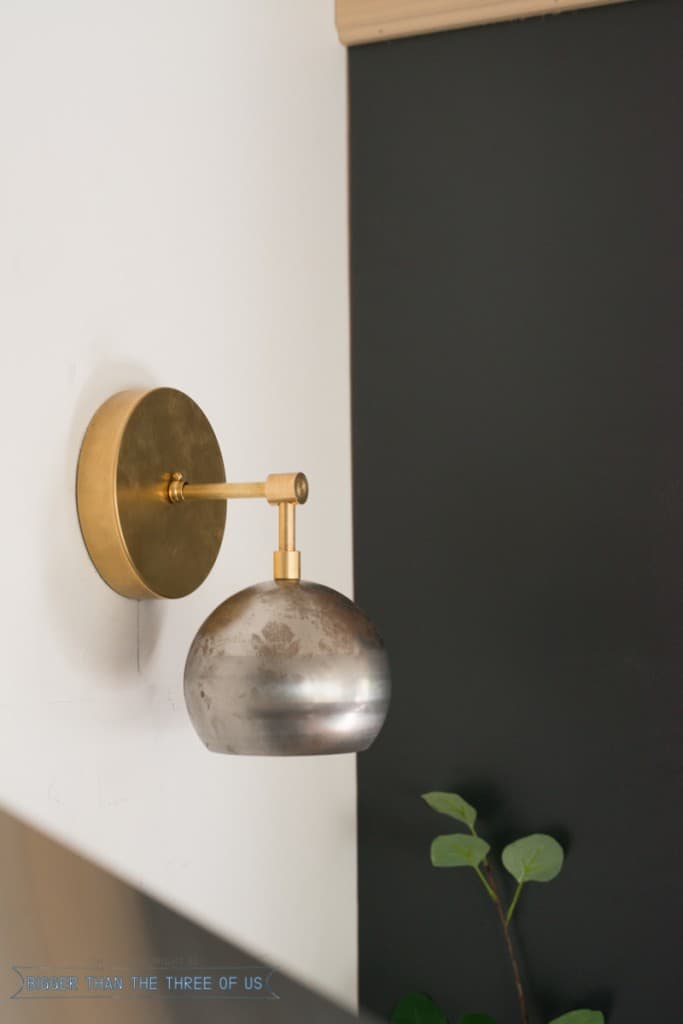
How to Style Your Sconces
Once your sconces are installed, it’s time to make them shine. Here are a few styling ideas to get you started:
Idea 1: Symmetry
Place identical sconces on either side of a mirror, artwork, or piece of furniture for a balanced look. This works especially well in bathrooms and entryways.
Idea 2: Layered Lighting
Combine sconces with other lighting sources, like ceiling fixtures or table lamps, to create depth and dimension in your space.
Idea 3: Go Bold
Choose sconces with unique shapes or finishes to make a statement. Think brass, black matte, or even gold for an extra touch of luxury.
Cost Considerations
Let’s talk money, shall we? The cost of installing sconces can vary depending on several factors, including the type of sconces you choose, the complexity of the installation, and whether you hire a professional. On average, you can expect to spend anywhere from $50 to $300 per sconce.
If you’re handy and willing to DIY, you can save a significant amount of money. Just be sure to factor in the cost of tools and materials if you don’t already have them on hand.
DIY vs. Hiring a Pro
Deciding whether to tackle the installation yourself or hire a professional depends on your comfort level with electrical work. If you’re confident in your skills, go for it! But if you’re unsure or dealing with complex wiring, it’s always safer to call in an expert.
Final Thoughts
There you have it—everything you need to know about how to install sconces. From choosing the right fixtures to wiring them up like a pro, this guide has got you covered. Remember, installing sconces isn’t just about lighting your space; it’s about enhancing your home’s style and functionality.
So what are you waiting for? Grab your tools, pick out some killer sconces, and get to work. And don’t forget to share your masterpiece with the world. Whether it’s on social media or just showing off to friends and family, you deserve all the credit for a job well done.
Have any questions or tips of your own? Drop them in the comments below. And if you liked this article, be sure to check out our other DIY guides for more home improvement inspiration. Happy installing!
Table of Contents
- What Are Sconces, Anyway?
- Why Install Sconces?
- Tools and Materials You’ll Need
- Choosing the Right Sconces
- How to Install Sconces: The Step-by-Step Process
- Tips and Tricks for Sconce Installation
- Common Mistakes to Avoid
- How to Style Your Sconces
- Cost Considerations
- DIY vs. Hiring a Pro
