How To Securely Connect Remote IoT VPC Raspberry Pi On AWS: A Step-by-Step Example
Listen up, tech enthusiasts, because this is the ultimate guide to securely connect remote IoT VPC Raspberry Pi AWS example. Imagine this: you're building a smart home system or monitoring an industrial process remotely, and you need your IoT devices to communicate seamlessly with the cloud. But here's the catch—you want to make sure everything stays secure, right? That's where AWS Virtual Private Cloud (VPC) comes in, offering you the power to create a private network for your Raspberry Pi and IoT devices.
This setup isn’t just for hobbyists anymore. Businesses and developers are leveraging AWS VPC to ensure their IoT deployments are rock-solid when it comes to security. Whether you're managing a fleet of sensors or controlling a remote device, securing your connection is no longer optional—it's mandatory. So, buckle up as we dive deep into this tech-savvy journey!
In this article, we'll walk you through every step of the process, from configuring your VPC to setting up your Raspberry Pi. By the end, you'll have a fully functional and secure IoT environment that's ready to take on the world. Let's get started!
Read also:Mastering Control Iot Behind Firewall Your Ultimate Guide
Table of Contents
- Introduction to Secure IoT Connections
- Understanding Raspberry Pi and AWS
- What is AWS VPC?
- Why Securing IoT Matters
- Setting Up Your AWS VPC
- Connecting IoT Devices to VPC
- Configuring Raspberry Pi for AWS
- Enhancing Network Security
- Example Scenario: Remote IoT Deployment
- Troubleshooting Common Issues
- Wrapping It Up
Introduction to Secure IoT Connections
First things first, let's talk about the importance of secure IoT connections. Picture this: you’ve got a bunch of IoT devices out there in the wild, collecting data, sending it back to the cloud, and maybe even controlling physical systems. If someone were to hack into one of those devices, they could cause chaos—or worse, compromise sensitive information.
That's why setting up a secure environment is crucial. AWS VPC gives you the ability to create a private network where your IoT devices can communicate safely. Think of it like building a fortress around your tech stack. No unauthorized access allowed!
Now, let's break down what we're dealing with here. The Raspberry Pi is your gateway to the IoT world, acting as a bridge between your physical devices and the cloud. When paired with AWS, it becomes a powerhouse for secure, scalable IoT deployments. We’ll show you exactly how to do it step by step.
Understanding Raspberry Pi and AWS
Before we jump into the nitty-gritty, let's clarify what we're working with. The Raspberry Pi is a tiny but mighty computer that can run Linux and handle all sorts of tasks. It's perfect for IoT projects because it’s affordable, flexible, and easy to set up.
Why Choose Raspberry Pi?
Here are a few reasons why Raspberry Pi is a top choice for IoT enthusiasts:
Read also:Steve Schirripa The Heart And Soul Of Blue Bloods And Beyond
- Cost-effective hardware
- Wide range of compatible sensors and modules
- Strong community support
- Easy to integrate with cloud platforms like AWS
On the other side of the equation, we have AWS, the cloud giant that powers countless businesses worldwide. With AWS, you get access to a suite of tools and services designed to make your IoT dreams a reality. From VPCs to IoT Core, AWS has everything you need to build a secure and scalable infrastructure.
What is AWS VPC?
Let's talk about the star of the show: AWS Virtual Private Cloud (VPC). A VPC is essentially your own isolated section of the AWS cloud. It's like having your own private network where you can launch resources and control who gets access.
Here are some key features of AWS VPC:
- Private IP address range
- Subnets for organizing resources
- Security groups to control inbound and outbound traffic
- Network Access Control Lists (ACLs) for added security
By using a VPC, you can ensure that your IoT devices are only communicating with trusted systems. This is especially important when dealing with sensitive data or critical infrastructure.
Why Securing IoT Matters
Now, let's address the elephant in the room: security. IoT devices are notorious for being vulnerable to attacks. From botnets to data breaches, the risks are real. That's why securing your IoT environment is non-negotiable.
Here are a few stats to drive the point home:
- According to a 2023 report, 70% of IoT devices have at least one critical vulnerability.
- IoT-related cyberattacks increased by 300% in the last two years.
- Businesses spend an average of $3 million annually on IoT security.
By using AWS VPC and following best practices, you can significantly reduce the risk of attacks. It's all about creating layers of security to protect your devices and data.
Setting Up Your AWS VPC
Ready to get started? Let's walk through the process of setting up your VPC. First, head over to the AWS Management Console and navigate to the VPC dashboard. From there, click on "Create VPC" and follow these steps:
Step 1: Define Your IP Range
Choose a CIDR block for your VPC. A common choice is 10.0.0.0/16, which gives you 65,536 private IP addresses. Make sure this range doesn't overlap with any existing networks you're using.
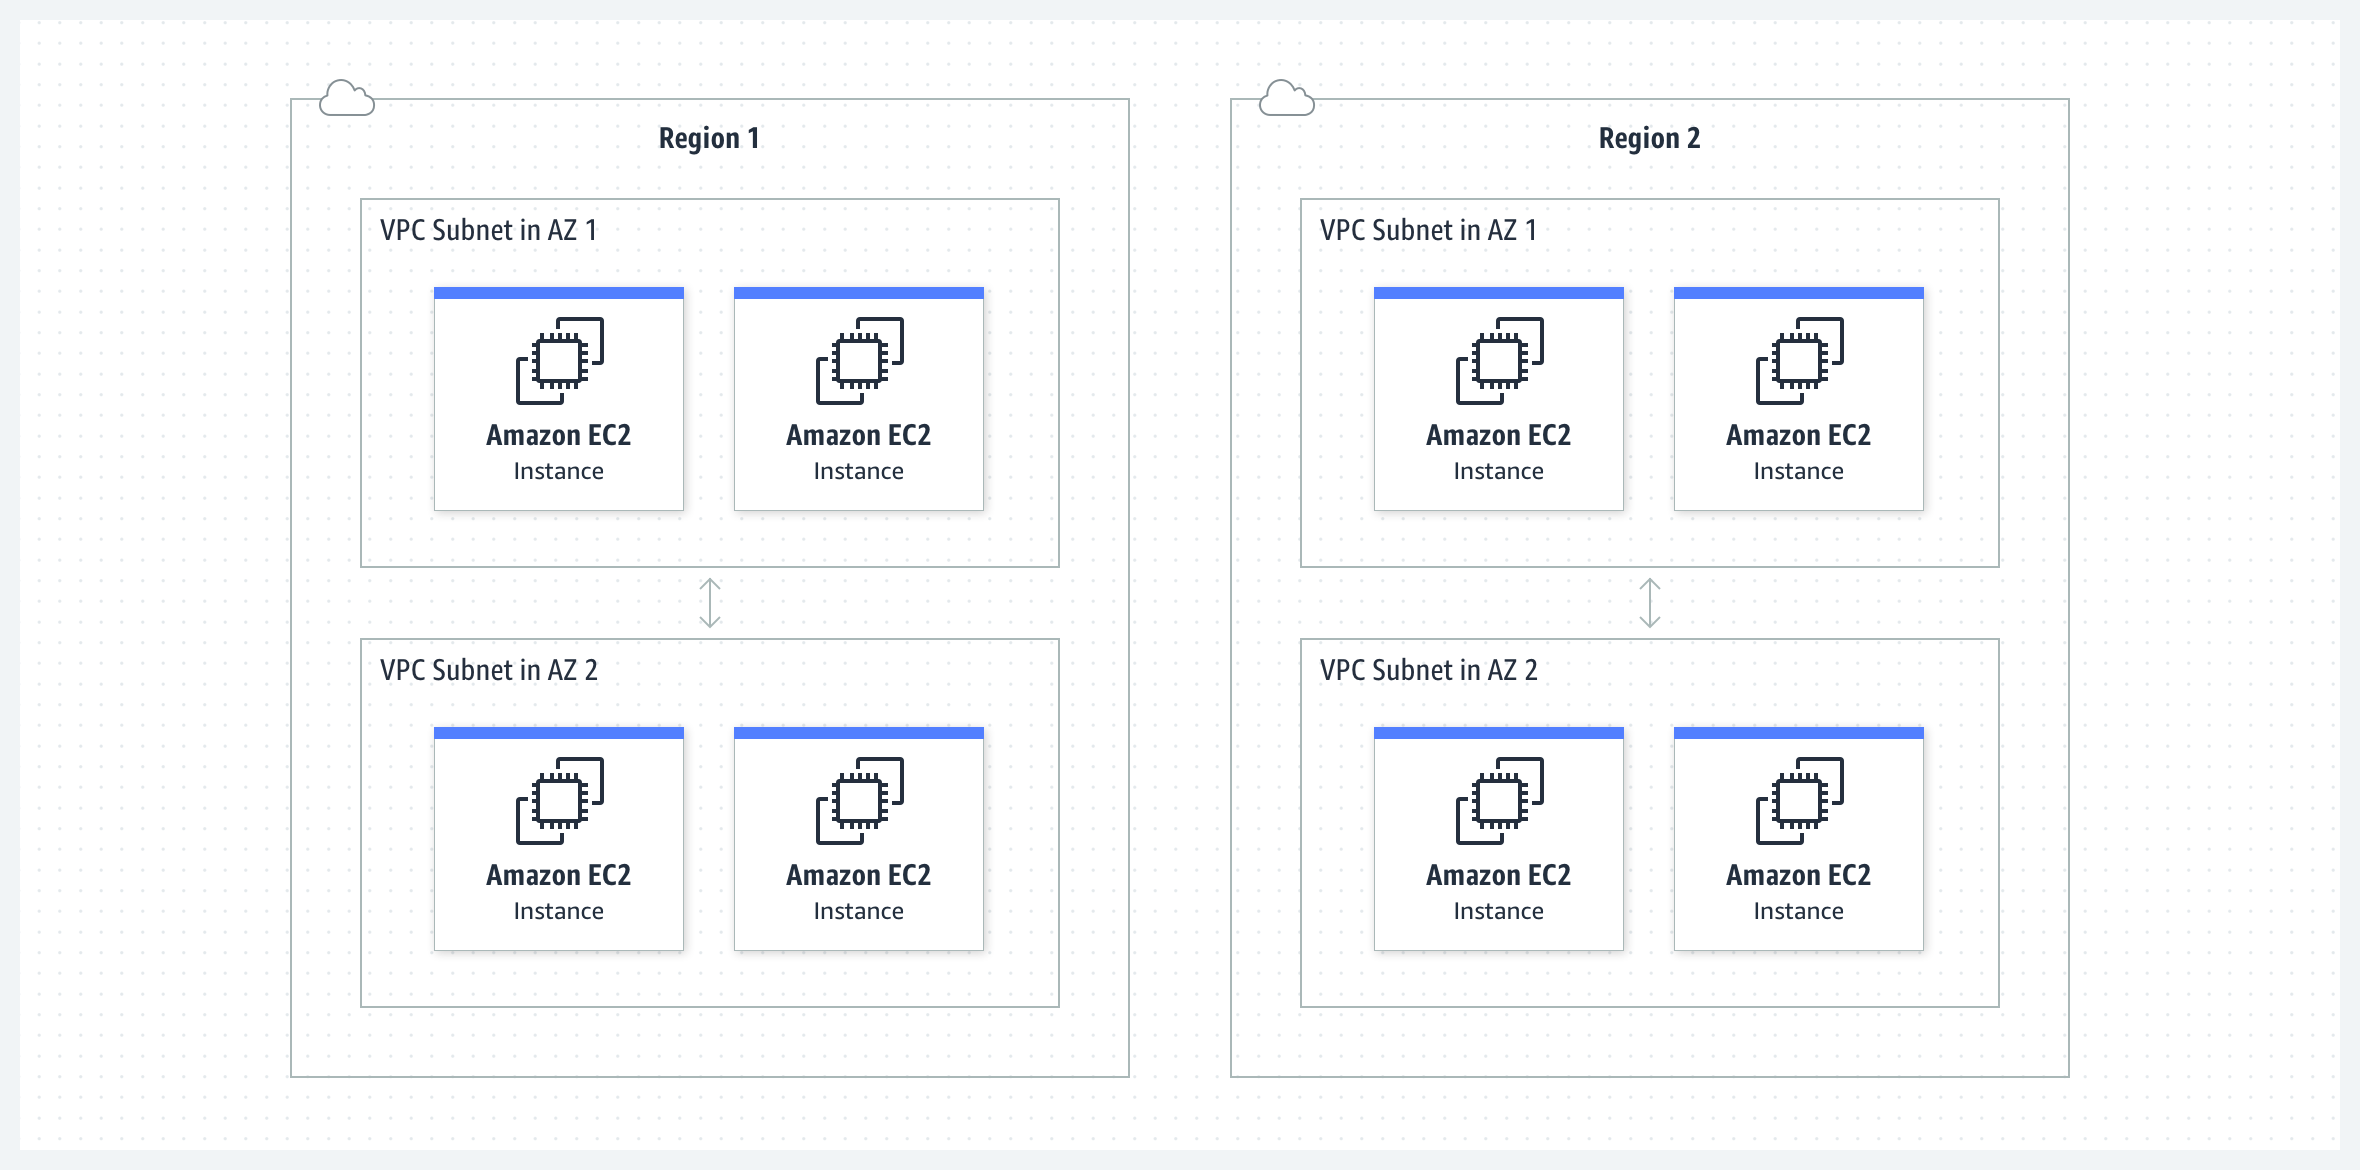
Step 2: Create Subnets
Subnets allow you to organize your resources into smaller groups. For example, you might create one subnet for your IoT devices and another for your database servers. This helps improve security and manageability.
Step 3: Configure Security Groups
Security groups act as virtual firewalls for your instances. You can define rules to allow or deny traffic based on IP addresses, ports, and protocols. For example, you might allow SSH access only from your home IP address.
Here's an example of a security group rule:
- Type: SSH
- Protocol: TCP
- Port Range: 22
- Source: Your home IP address
Connecting IoT Devices to VPC
Now that your VPC is set up, it's time to connect your IoT devices. This is where the Raspberry Pi comes in. You'll need to configure your Pi to connect to the VPC and communicate with your AWS resources.
Step 1: Install Necessary Software
Start by installing the AWS CLI and AWS IoT SDK on your Raspberry Pi. These tools will allow you to interact with AWS services from the command line.
Step 2: Set Up IoT Core
AWS IoT Core is the service that enables secure communication between your devices and the cloud. You'll need to create a thing, register a certificate, and define policies to control access.
Step 3: Test the Connection
Once everything is configured, test the connection by sending a sample message from your Raspberry Pi to AWS IoT Core. If everything is working correctly, you should see the message appear in the AWS console.
Configuring Raspberry Pi for AWS
Let's dive deeper into configuring your Raspberry Pi for AWS. Here's a quick checklist to ensure everything is set up correctly:
- Update your Pi's operating system using `sudo apt update && sudo apt upgrade`
- Install the AWS CLI using `pip install awscli`
- Configure the AWS CLI with your credentials using `aws configure`
- Install the AWS IoT SDK for Python or C
It's also a good idea to enable SSH on your Pi so you can manage it remotely. Just remember to secure your SSH connection by disabling password authentication and using key-based authentication instead.
Enhancing Network Security
Security is an ongoing process, not a one-time task. Here are some additional steps you can take to enhance the security of your IoT environment:
- Use strong passwords and two-factor authentication for all accounts
- Regularly update your software and firmware to patch vulnerabilities
- Monitor your network for suspicious activity using AWS CloudWatch
- Implement encryption for data in transit and at rest
By following these best practices, you can create a secure and resilient IoT infrastructure that stands the test of time.
Example Scenario: Remote IoT Deployment
Let's put everything together with a real-world example. Imagine you're deploying a fleet of IoT sensors in a remote location to monitor environmental conditions. Here's how you'd use AWS VPC and Raspberry Pi to securely connect everything:
Step 1: Set Up the VPC
Create a VPC with subnets for your sensors and a NAT gateway to allow outbound internet access.
Step 2: Configure the Raspberry Pi
Install the necessary software on your Raspberry Pi and configure it to connect to AWS IoT Core.
Step 3: Deploy the Sensors
Connect your sensors to the Raspberry Pi and start collecting data. Use AWS IoT Analytics to process and analyze the data in real-time.
Step 4: Monitor and Maintain
Keep an eye on your deployment using AWS CloudWatch and make adjustments as needed to ensure everything stays secure and functional.
Troubleshooting Common Issues
Even with the best planning, things can go wrong. Here are some common issues you might encounter and how to fix them:
- Connection Issues: Check your security group rules and ensure your Pi has the correct IP address.
- Authentication Errors: Verify your AWS credentials and ensure your certificate is valid.
- Data Loss: Implement backups and use durable storage solutions like Amazon S3.
Remember, troubleshooting is part of the process. Don't get discouraged if things don't work perfectly the first time. Keep experimenting and learning, and you'll eventually get it right.
Wrapping It Up
And there you have it—a comprehensive guide to securely connect remote IoT VPC Raspberry Pi AWS example. By following the steps outlined in this article, you can create a secure and scalable IoT environment that meets your needs.
Remember, security is key when it comes to IoT. Don't skimp on best practices or take shortcuts. Your data and devices are worth protecting, and AWS VPC provides the tools you need to do just that.
Now it's your turn to take action. Leave a comment below and let us know what you're building with IoT and AWS. And if you found this article helpful, be sure to share it with your friends and colleagues. Happy coding, and stay secure out there!


